The first job was to create the text, but as I hadn't got the Sky one font at this point, I just used some generic text to see what it would look like:


Next I had to make a camera pan around the text, we learnt path constraints in tutorial 2 with Jo Bowman. It is a very simple but effective operation in 3D Max. To do this, you first need to make the path that you require the camera to travel on, this is simply done by using the line tool found in the Splines menu option. Or you could use an arc, a circle, anything 2d basically that contains a line under splines. I chose an arc so that the camera would move in a curved fashion.
Next came the camera, I chose a target camera so that I could then choose the SKY ONE logo as its target at it would always be stuck to looking at the logo as it pans around it. So I placed the camera on stage and assigned it to its path. To do this, the camera needs to be selected and then from the main menu tabs at the top of the window, click 'Animation' > 'Constraints' > 'Path Constraint'.
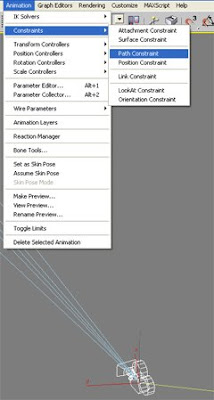
The mouse cursor should now have a dotted line attatched to it coming from the camera (see below). This dotted line needed to be attached to the path, so by clicking on the arc I created, the camera automatically places itself at the beginning of the line becuase I am at frame 1 at the second (If my keyframe slider had been at frame 50 for example, the camera would automatically be placed somewhere in the middle of the arc).
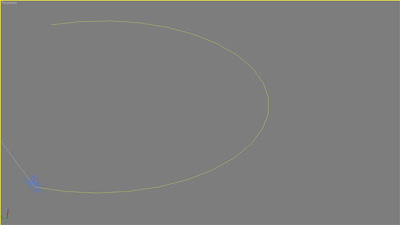
By pressing play now, the camera moves around and I could get a good idea of how the general animation will work now.
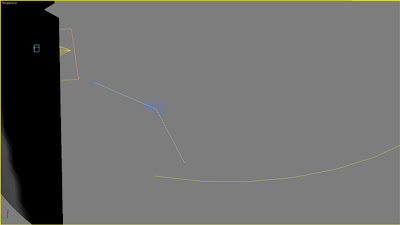
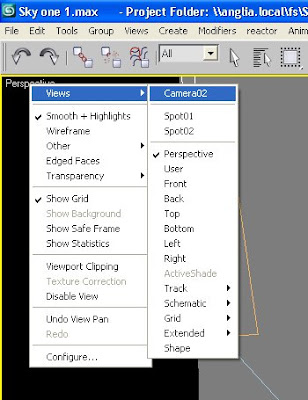
If I right click at the top-left of the viewport and click 'Views' > 'Camera 01' It will the make sure that i see the cameras' view in the viewport display, and clicking play on the keyframe controls will the show a much quicker view of the animation without rendering.

Now I felt I needed to add some scenery in alignment with my Mood board for this Ident, So I thought a jungle background would be a nice approach, I started by creating a large plane with 20 width segments and 20 length segments (Ill explain why in a minute). I then used the rotate tool at the top of the window just underneath the menu bar to rotate it vertically.

I then needed an image for the background, so from a generic image search online, I found this picture:
 but it needed some more darkness and mood to it, so I put it into photoshop and adjusted the contrast and brightness which
 resulted in this:
 So to apply this image to the plane was fairly simple. First of all I clicked on the 'Material Editor' and chose a free sphere to work on and apply my image, to start with, I changed the sphere to a box because I wanted the image to be applied to a flat surface. To change this, I just clicked on the sphere at side of the material editor (pictured below) until a list of shapes came out and I could choose. The I clicked on the button next to diffuse map and then chose 'BITMAP' and then chose the jungle image i had modified in Photoshop from the directory where it was saved.
 I then previewed what the animation would look like but the full background was not in the shot, so I experimented by making the background plane bigger which still was unsuccessful in my attempt, and also the background looked a bit 'wooden' when it was still rendered.
 So to increase the reality of the background I added a bend modifier to the plane so that i could wrap it around the sky logo and have more of a decent angle when it was being filmed,
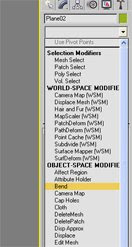
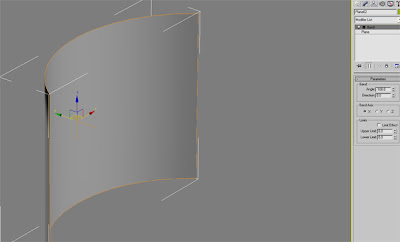
I kept it at a different angle to the arc because I wanted the distances between the background and the camera to change adding realism.
Setting the scene
The next task was to create some 3d Scenery, I decided i wanted a forest and some black smoke to represent the jungle and the mysterious black smoke that appears in Lost every so often. So to create the jungle effect I wanted to animate a growing forest surrounding the logo. I thought this would be quite challenging so I searched up some tutorials on the basics of animating as well as spending time in Jo's lectures to learn how to animate a tree growing.
The essence of the animation is simple, its the fine tuning that requires the hard work. I started by creating a cylinder About 20-30 radius and 0-1 height, then by using the 'Autokey' function and moving the keyframe slider to frame 150, I changed the tree by extending it to about 250 in length and the radius at the top of the tree changed to smaller than the radius at the bottom. Now by using the play action on the slider I can see how the tree will be animated.
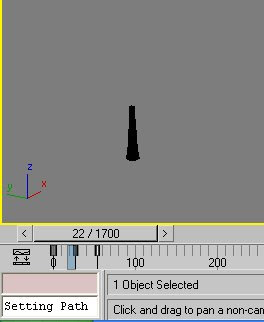

So to create the branches for the tree is a case of using boxes in the same way I created the tree trunk, but smaller. I created a box with a radius of 5 and a height of 0-1 and used 'Autokey' again and at frame 50 i stretched out the box and tapered it at the top to replicate the start of the branch, I then cloned the box and put a few different variations on the taper at the top so some were pointy so i had a few, and then grouped them together and animated them with the slider.
The next task was to create the leaves and add them into the group, which were just a flat square stretched into a diamond shape and coloured green, the reason for the lack of detail used in the leaves was because this small item would be used hundreds of times and although it would've been a small task to spend a good amount of time creating a nice detailed leaf, I thought it would be better to leave it simple for quicker rendering times. The branch with the leaves was then grouped at this point so it was recognisable as one object.
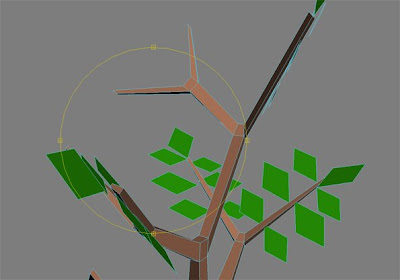
Now everything was created, i needed to use a Particle Systems 'PF Source' to enable the tree to grow and allow the branch to be placed up the side of the tree. The next task was to allow the tree to multiply and have them all grow at random times. My settings for this in Particle Systems are pasted below in pictures.
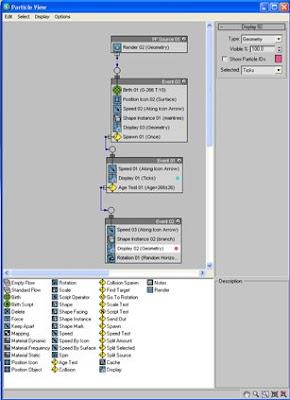
The settings that I have specified above allow the scene to multiply each tree and branch at random times in random places. To place the trees in the position that I would like, what I did was to go to the last frame (1700) and then rotate and move the PF Source square when the trees were at their final resting position.
So at this point I used the camera view to see how the animation looked, judging by what I could see the trees were up too high and you could see the bottom of the trees, this is not what I wanted so all I had to do was move the trees lower down. I then added two light sources to get the lighting effect required by using 2 target spotlights - 1 for the background and one for the logo.
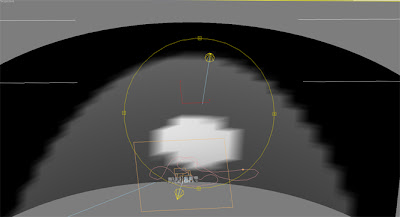
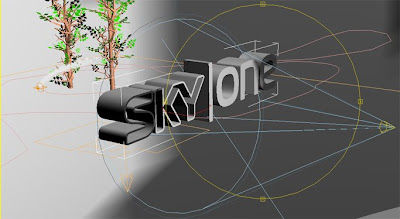
Sky One Logo
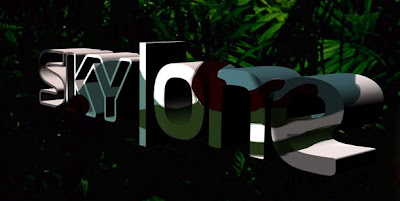
Now the text, I had been pretty restricted up to this point not being able to install fonts on the Universities PC's because of admin restrictions because I had downloaded a SKY font. So I found a friend with 3D Studio max on their computer, I then installed the font and created the text on their version of 3d max and exported the text as a .3ds file. This then enabled me to be able to import it into each of my scenes using the proper SKY one font for the logo. Next, I wanted a jungle effect to be had on the logo, so I sourced a camouflage picture from a generic image search online and used that as a material and applied it to my SKY one logo. Making it look like this:
The Black Smoke
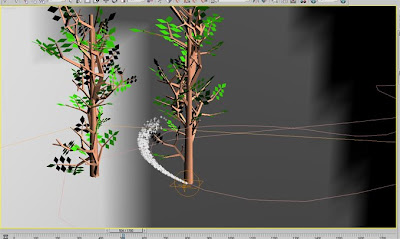
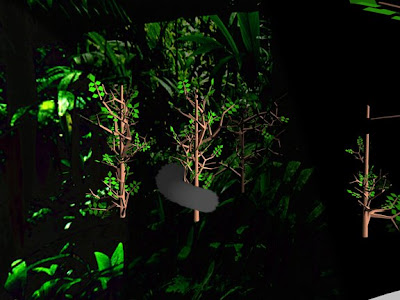
The next task was to create the smoke for the scene and for it to weave in and out of the trees. I looked for tutorials on tutorialized.com because to be honest i didn't know where to start in 3D max, after half an hour of looking i found a tutorial on a smoke trail coming from a plane engine and thought that this could be suitable if following a path constraint, So I went ahead and followed the tutorial here: (http://www.tutorialized.com/view/tutorial/Animating-an-airplane-with-smoke/32790)
I followed this tutorial but changed a couple of things, one being the material, I changed it to more of a black/dark grey colour, Also using a gradient diffuse map to differentiate between the colours. Then also created a path for the smoke to follow in and around the trees/logo. This then enabled me to place the smoke on stage and work out where the ins and outs of the path would be and to make sure it was seen enough as the camera panned around.
Sound
For the sound FX, I wanted to use something that was familiar with Lost, so i thought the best thing I could go for was the sound of the Black smoke when it hovers around people, so I found a couple of video clips of Lost online, downloaded them and imported them into Adobe Premiere pro, At this point, I could then split the sound from the video and I chose around about 30 seconds worth of audio that could then be exported as an MP3 file for adding to my animation after it had rendered.
My timeline started at around about 900 but because I the speed i wanted the animation to go at, I had to add almost twice the frames (1700) to meet the required length for this animation, but this meant that i could have fast travelling smoke with the right length of animation, however it did slow down rendering times to about 3 hours for the final cut.
Once rendered the music was then added in Adobe Premiere pro with two sound layers so that two tracks could play at the same time, I raised the volume on one of them because I wanted it to be more prominent than the other. Here is the video for the final production of
Sky one Ident 1