skip to main |
skip to sidebar
The Creation
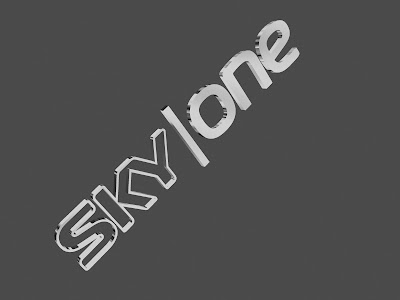
To start with, the idea I came up with for the third Ident was to have the SKY one logo falling from the sky with a camera panning around it. So the first task for me was to animate the text/Logo falling down, again I imported the SKY one text from my first scene and made a chrome material to add to it this time. 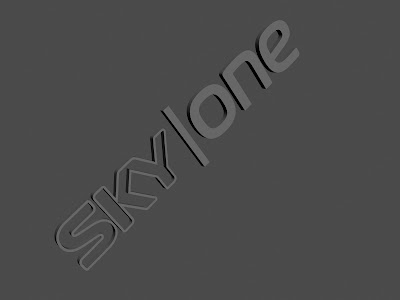
To make the chrome material, I had to enter the material editor and choose a spare sphere, and chose a dark gray diffuse color (for a perfect mirror it should be black, but often a dark grey color has a better effect on chrome). Then I went to add glossiness and specular level (there are no fixed values, the correct effect strongly depends on the light that you create. You can begin with the value 40 in both slots).
The next step was to go to maps and assign to the 'Reflection' map 'Raytrace'. This will allow you to have real reflections of other objects in the scene on this material. The value in the reflection slot should be between 85 and 100 (a mirror must have 100). After I had inserted 'Raytrace' in the reflection map, I saw that the material editor was showing new settings.
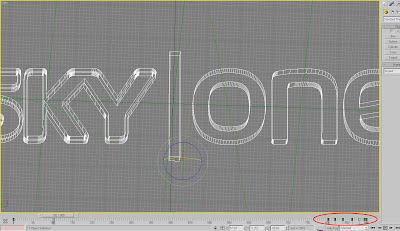
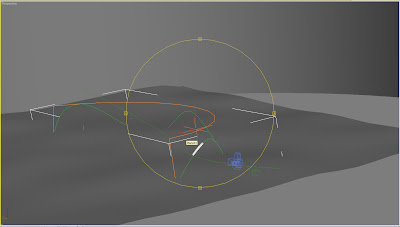
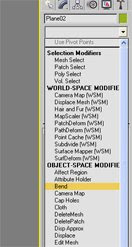
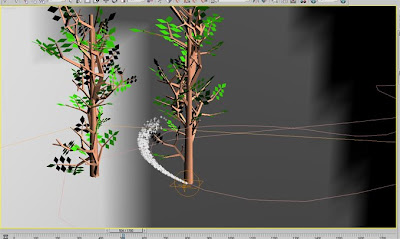
These are the settings of the raytrace panel (on the right side of the material editor you can see written RAYTRACE instead of standard). In there, I assigned a bitmap to the none button in order to display a chrome effect in the reflection. Now the material was out of the way, I could get with getting the text to fall, so the next job was to create the path I wanted the logo to follow, this consisted of creating a vertical line and choosing this line as a path constraint (Animations - Constraints - Path Constraint). Next I had to adjust the keyframe position on the slider, each time a keyframe is set, it leaves a little red block on the slider (see image):
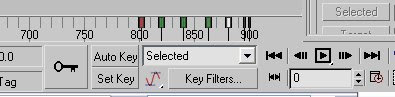 And this represents the end of the individual animation point, so if this is slid backwards, we can speed up the animation and make it finish sooner, so I did this and left about 50 keyframes on the end spare and created another keyframe at the end (with the text still selected here) and rotated the text round a bit (about 30 degrees) to come in line with the camera when we place it there later.
Ground
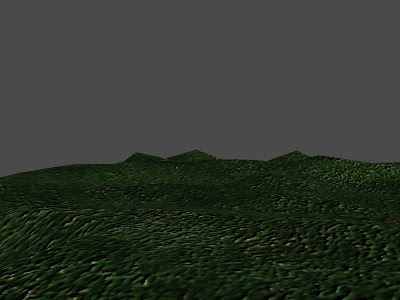
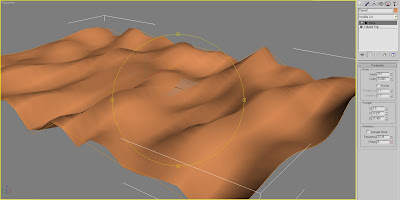
For the ground, I wanted grass and small hills so to achieve this I created a large plane and added a noise modifier to it and experimented with the settings until it gave the effect I was looking for. For the grass effect I would've used the Hair & Fur modifier if it wasn't for the lengthy rendering times and as my scene was about 900 frames long, I thought it would be a better option to use a diffuse map of grass and a bump map of a picture of some grass as well, that way, it renders much quicker.
Background
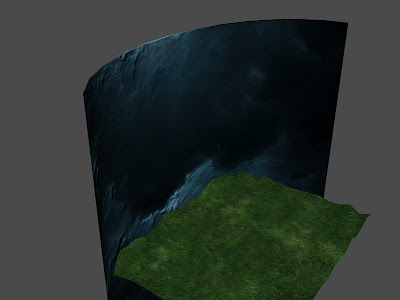
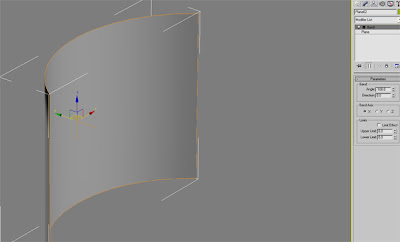
For the background, I used the same method as I had been doing with the other Idents, create a large plane, rotate it vertically, add a diffuse map and a bump map of a night sky, this one I also chose a Moody night sky and added a bend modifier on it so it would look relatively realistic as the camera pans around the text.
 Camera
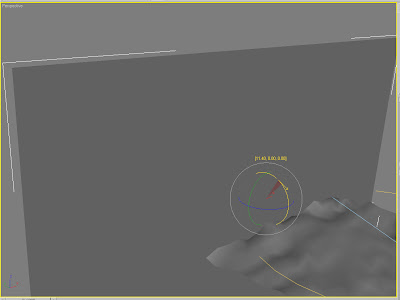
Time to add the camera so we can view the scene properly so far, I used the arc tool from the splines shapes menu and created a large arc placed in front of the background and text. Next I introduced a target camera and assigned the arc as the cameras path constraint for it to move around on. The background was set as the camera target so that it didn't move and gave more of an impression that the text was actually falling from the sky. now the camera actually pans around the text in the viewport I rendered the scene to see what had been created already.
Finishing Touches
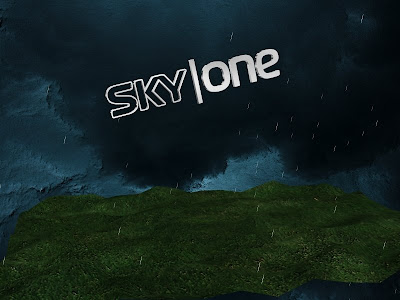
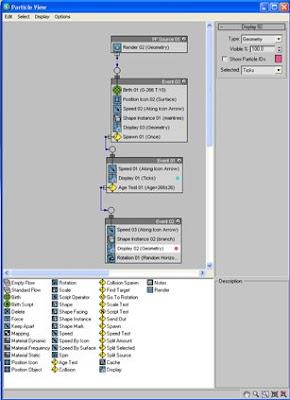
After reviewing what at this point was the final render, I still believed it was missing something, I believed the moody sky should be raining to add to the effect. So i searched up tutorials mainly on tutorialized.com to search for something that would suit my needs and found a rain tutorial here: (http://www.tutorialized.com/tutorial/Rain-Fall-Animation-Tutorial-for-beginners/34264) the rain was created from a particle Systems 'PF Source' (even though in the tutorial it says to use spray) I chose to use 'PF Source' instead purely because of the properties it has and the adjustability of it. I used these settings with the rain fall:
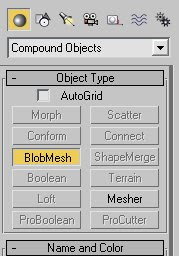
These settings tell the PF Source to create particles that will fall downwards and when to start and when to stop, also in the properties you control how many times they appear, obviously the more there is, the longer it will take to render the scene. Next I attached a Blobmesh to the PF Source to identify the shape of the particles when they're rendered.
Whatever shape the blobmesh is, the particles will be, so first of all I chose a sphere with a see through material to look like water droplets. But after watching the animation through, they didn't look right and I decided to use a long javelin style rain drop as they are falling from the sky and this worked much better.
Lighting
The only thing left to do in 3d Max before rendering was add the lighting to illuminate the scene. I decided to use a target spotlight to highlight the clouds and the edges within the scene, as you can see below, in this scene it makes quite a bit of difference with and without the light:
Without:
With:
This was a result of putting the spotlight here:
So even though the ground is darker in the scene with light, I feel it puts across much more of a mood when you're watching it. Sound FX
After rendering this in 3d Max, the job of adding sound to the animation came up, well again I wanted to stick with the Lost theme so I used the Intro music to Lost as the logo was falling down, but in addition, I added some wind sound effects to the scene as well, I used Adobe Premiere pro to edit/add sound
Here is a clip of the final Production:
Starting out
I started by creating a large plane and experimenting with some options, I first intended to create a landscape but after messing around with some options, i came to the conclusion that i would create water instead. This came about because after creating the plane, I added a 'noise' modifier.
I played about with the settings on the noise modifier until i felt it looked right, originally i added a grass material to the plane because as I said, I was going to create a landscape. But then I saw a tick box that said 'Animate Noise', i clicked it and viewed the results by clicking play on the timeline. The result was pretty good and animated the land like you would see the ocean moving about in the wind, so I decided that I would create a water material and add that to the plane to make it water instead.
Material properties
How I created the water material;
The first empty slot should be selected by default. We will now make a water material with this one. Set Specular Level = 102 (approx.) and Glossiness = 49 (approx.). 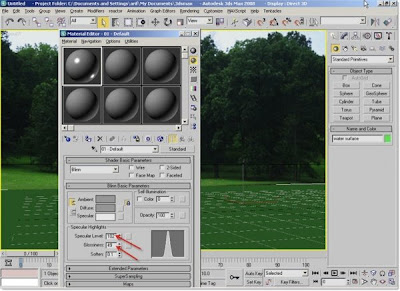 Go down and expand the Maps roll-out.
Then click the None button in the Bump slot. In the Material/Map browser window, choose Noise. In Noise Parameters, set the Size value = 5. It may be adjusted further later on while having a look on the rendered result for the water. 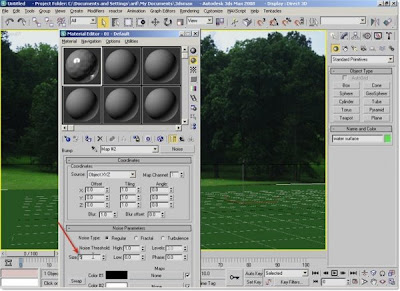
Now, assign a Flat Mirror map to the Reflection map (just under the Bump slot). Flat Mirror is good enough as water kind reflection map. 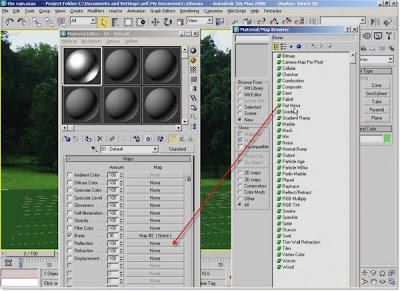
Under Distortion group, increase the Distortion Amount value to 2 To get enough noisy reflection. And to match the reflection with the Bump look choose “Use Bump Map” option. 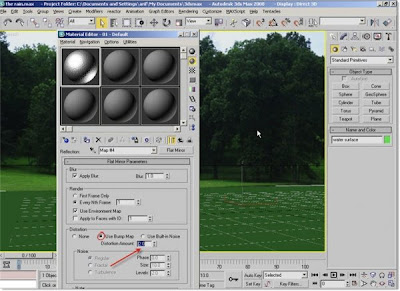
Now the water is ready, this was then added to the plane in order to apply it and make it look like water. So what we have now is a scene that looks like the middle of the ocean with the moving plane and water effect.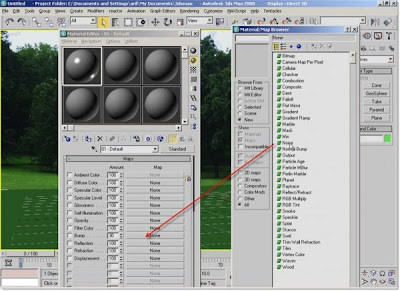 Background
Much the same as in the first Ident I created, I needed a constant background but didn't want to use the rendering 'environment' option that seems a little bit unrealistic when watching an animation because it doesn't change when the camera moves, it is just one constant image and more suited to still rendered images.
So again, i created a large plane, rotated it 90 degrees so it was vertical. I then added a bend modifier so I could wrap it around the plane and keep it in the background at all times.
 At this point i decided to add the material, which was going to be a moody sky, i created this material by going into the material editor and choosing one of the free spheres, I then added the diffuse map of the picture i was going to use. I then changed the sphere to a Box so i could see how the picture would be applied to a flat surface, i then added the same picture as a bump map so that the clouds would appear more realistic in the scene and come out of the plane as it were.
 Logo
Logo
Time to choose how the sky logo was going to appear, i decided after some time thinking that the way i wanted the SKY one logo to appear was as if it had floated to the surface and then proceeded to bounce around as if it was resting on the water when it moved. So what I did, was import the logo file I had created previously on my friends laptop, as explained in the making of Ident 1.
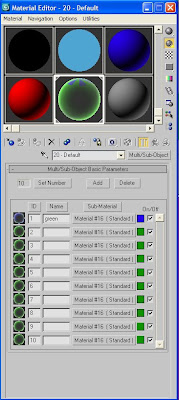
 I added a material that was made from a Multi-Sub Object, with 9 colours of green and 1 segment of blue, this was then applied to the logo.
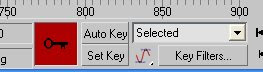
So the logo was now on scene, I adjusted the size so it wasn't too small and attached it to a vertical path constraint which then as the keyframe slider moved along, the SKY one logo moved upwards, I then placed this just above the water on the last 50 frames and saved the last 50 frames for manually adjusting the position of the logo frame by frame using the 'manual key' to adjust it and give it a bobbing effect on top of the water.
Camera Positioning
One of the hardest decisions to make was as to how the camera was going to move along the scene and I decided that moving along the water as if the camera was a person being tossed about by the waves and then moving up out of the water at the end to give a birds eye view of the SKY logo. First of all I had to create the path for the camera, so i used the line tool to create a line with several curves along it a placed it over the plane/water.
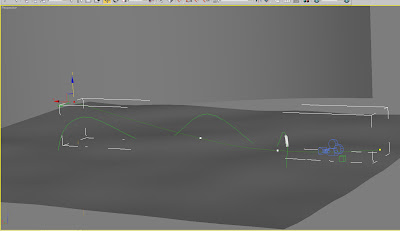
I then used the rotate tool to angle it slightly and make the curves raised to give it more of a bump. I then attached a free camera to the line using the path constraint tool and watched from a distance how the camera moved over the sea. Using the vertices's adjuster on the modify toolbar: I selected the point at the end of the line where it reaches the SKY logo and raised it in the air to accomplish where I wanted the camera to get its birds eye view of the logo.
Black Smoke
Although I had already used a black smoke effect in the first Ident I created, I felt it would a good addition to this scene as well, but I wanted it moving in a different way. I wanted the black smoke to move in and out of the water like how a Dolphin swims jumping in and out of the water. I used the line tool to create the path for this making the path go up and down, up and down continuously until it was big enough to have a large jump and be seen on camera.
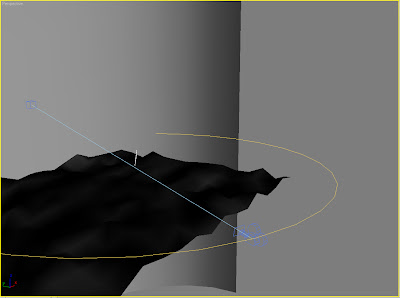
The path then needed to be rotated vertically to have the smoke going up and down instead of side to side and also added a bend modifier (can bee seen in above picture). I then imported the black smoke from the first Ident I had created and attached this to the path i had created. I placed the path so that the bottom half of the path was underwater. This allowed the smoke effect to travel beneath the plane and come out again following the path.
Fine Adjustments
Watching the animation through showed me that the camera did look bouncy enough at this time but it wasn't catching much of the smoke through the viewport display when you watched the movie through, so the next task was to adjust the camera using the 'Manual Key' option to fine tune the camera on an individual key frame so that it sees the smoke as it travels down the plane. This took about 2 hours to complete and perfect, but for the result, it was well worth it.
Manual Key option:
End problems and issues
The only slight issue I would say I had was trying to keep the background plane always in the viewport, there were a lot of times you could just catch the edge of the plane when watching the movie through and sometimes adjusting it in one place made it worse in another. I could have just simply made it bigger, but there were two potential problems if I was to do this, first of all, i was worried it could degrade the picture quality on the material and second of all, I thought rendering times would be dramatically increased by enlarging the plane too much. i experimented with enlarging it and seeing how much longer it would take to render and it didn't prove to be too bad, So i made it bigger, but not drastically big and rendered the final scene, which I was happy with and accepted as the final outcome.
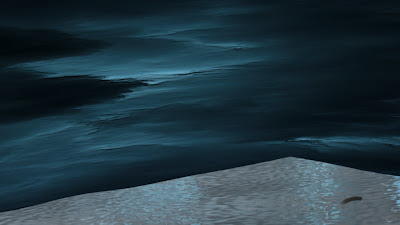
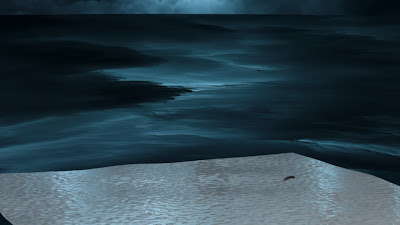
LightingBecause in this scene I was trying to replicate a dark, moody night, I didn't feel that much light was needed in the scene, however I did try adding an omni light to just generally add light to the whole scene, but the difference it made was so minimal that I thought it wasn't worth the sacrifice to rendering times to keepit in the scene.
Without Lighting:
With Lighting:
Music
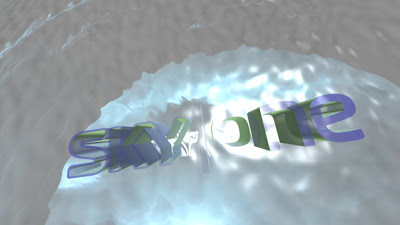
For the music, i wanted to stay within the Lost theme, So I used the Ending music to a lost episode which I feel went quite well with this scene, I experimented with using splashes for the Smoke going in and out of the water but it didn't sound right in my opinion and also you don't normally hear sound effects in regular channel idents, So I decided to leave it out in the end. Here is the final Scene;
The first Sky One Ident I Have created is going to have a nightime effect in the jungle. I started off with the idea that I would have some sky one text on the scene from the start and have a camera panning around it with the black smoke from Lost travelling at some speed around the SKY ONE logo.
The first job was to create the text, but as I hadn't got the Sky one font at this point, I just used some generic text to see what it would look like: 

Next I had to make a camera pan around the text, we learnt path constraints in tutorial 2 with Jo Bowman. It is a very simple but effective operation in 3D Max. To do this, you first need to make the path that you require the camera to travel on, this is simply done by using the line tool found in the Splines menu option. Or you could use an arc, a circle, anything 2d basically that contains a line under splines. I chose an arc so that the camera would move in a curved fashion.
Next came the camera, I chose a target camera so that I could then choose the SKY ONE logo as its target at it would always be stuck to looking at the logo as it pans around it. So I placed the camera on stage and assigned it to its path. To do this, the camera needs to be selected and then from the main menu tabs at the top of the window, click 'Animation' > 'Constraints' > 'Path Constraint'. 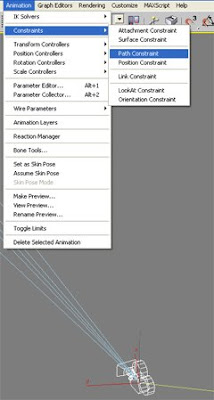
The mouse cursor should now have a dotted line attatched to it coming from the camera (see below). This dotted line needed to be attached to the path, so by clicking on the arc I created, the camera automatically places itself at the beginning of the line becuase I am at frame 1 at the second (If my keyframe slider had been at frame 50 for example, the camera would automatically be placed somewhere in the middle of the arc). 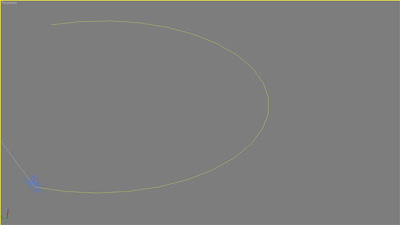
By pressing play now, the camera moves around and I could get a good idea of how the general animation will work now. 
If I right click at the top-left of the viewport and click 'Views' > 'Camera 01' It will the make sure that i see the cameras' view in the viewport display, and clicking play on the keyframe controls will the show a much quicker view of the animation without rendering. 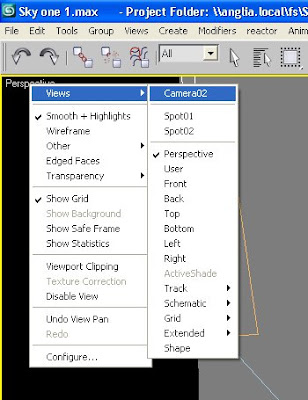

Now I felt I needed to add some scenery in alignment with my Mood board for this Ident, So I thought a jungle background would be a nice approach, I started by creating a large plane with 20 width segments and 20 length segments (Ill explain why in a minute). I then used the rotate tool at the top of the window just underneath the menu bar to rotate it vertically. 
I then needed an image for the background, so from a generic image search online, I found this picture:  but it needed some more darkness and mood to it, so I put it into photoshop and adjusted the contrast and brightness which
 resulted in this:
So to apply this image to the plane was fairly simple. First of all I clicked on the 'Material Editor' and chose a free sphere to work on and apply my image, to start with, I changed the sphere to a box because I wanted the image to be applied to a flat surface. To change this, I just clicked on the sphere at side of the material editor (pictured below) until a list of shapes came out and I could choose. The I clicked on the button next to diffuse map and then chose 'BITMAP' and then chose the jungle image i had modified in Photoshop from the directory where it was saved.  I then previewed what the animation would look like but the full background was not in the shot, so I experimented by making the background plane bigger which still was unsuccessful in my attempt, and also the background looked a bit 'wooden' when it was still rendered.
So to increase the reality of the background I added a bend modifier to the plane so that i could wrap it around the sky logo and have more of a decent angle when it was being filmed,
I kept it at a different angle to the arc because I wanted the distances between the background and the camera to change adding realism.
Setting the scene
The next task was to create some 3d Scenery, I decided i wanted a forest and some black smoke to represent the jungle and the mysterious black smoke that appears in Lost every so often. So to create the jungle effect I wanted to animate a growing forest surrounding the logo. I thought this would be quite challenging so I searched up some tutorials on the basics of animating as well as spending time in Jo's lectures to learn how to animate a tree growing.
The essence of the animation is simple, its the fine tuning that requires the hard work. I started by creating a cylinder About 20-30 radius and 0-1 height, then by using the 'Autokey' function and moving the keyframe slider to frame 150, I changed the tree by extending it to about 250 in length and the radius at the top of the tree changed to smaller than the radius at the bottom. Now by using the play action on the slider I can see how the tree will be animated.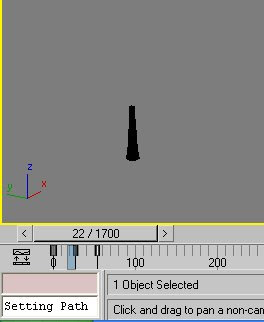
 So to create the branches for the tree is a case of using boxes in the same way I created the tree trunk, but smaller. I created a box with a radius of 5 and a height of 0-1 and used 'Autokey' again and at frame 50 i stretched out the box and tapered it at the top to replicate the start of the branch, I then cloned the box and put a few different variations on the taper at the top so some were pointy so i had a few, and then grouped them together and animated them with the slider.
The next task was to create the leaves and add them into the group, which were just a flat square stretched into a diamond shape and coloured green, the reason for the lack of detail used in the leaves was because this small item would be used hundreds of times and although it would've been a small task to spend a good amount of time creating a nice detailed leaf, I thought it would be better to leave it simple for quicker rendering times. The branch with the leaves was then grouped at this point so it was recognisable as one object.
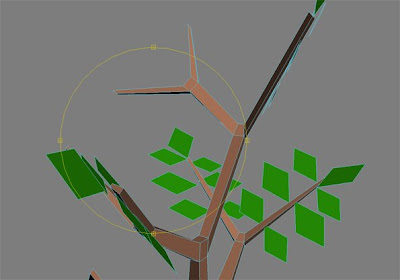
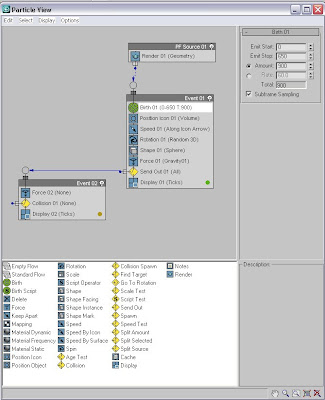
Now everything was created, i needed to use a Particle Systems 'PF Source' to enable the tree to grow and allow the branch to be placed up the side of the tree. The next task was to allow the tree to multiply and have them all grow at random times. My settings for this in Particle Systems are pasted below in pictures.
The settings that I have specified above allow the scene to multiply each tree and branch at random times in random places. To place the trees in the position that I would like, what I did was to go to the last frame (1700) and then rotate and move the PF Source square when the trees were at their final resting position.
So at this point I used the camera view to see how the animation looked, judging by what I could see the trees were up too high and you could see the bottom of the trees, this is not what I wanted so all I had to do was move the trees lower down. I then added two light sources to get the lighting effect required by using 2 target spotlights - 1 for the background and one for the logo.
Sky One Logo
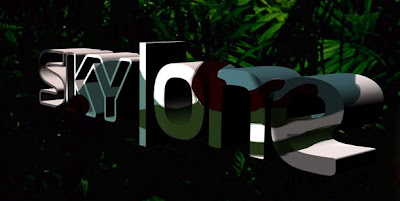
Now the text, I had been pretty restricted up to this point not being able to install fonts on the Universities PC's because of admin restrictions because I had downloaded a SKY font. So I found a friend with 3D Studio max on their computer, I then installed the font and created the text on their version of 3d max and exported the text as a .3ds file. This then enabled me to be able to import it into each of my scenes using the proper SKY one font for the logo. Next, I wanted a jungle effect to be had on the logo, so I sourced a camouflage picture from a generic image search online and used that as a material and applied it to my SKY one logo. Making it look like this:
The Black Smoke
The next task was to create the smoke for the scene and for it to weave in and out of the trees. I looked for tutorials on tutorialized.com because to be honest i didn't know where to start in 3D max, after half an hour of looking i found a tutorial on a smoke trail coming from a plane engine and thought that this could be suitable if following a path constraint, So I went ahead and followed the tutorial here: (http://www.tutorialized.com/view/tutorial/Animating-an-airplane-with-smoke/32790)
I followed this tutorial but changed a couple of things, one being the material, I changed it to more of a black/dark grey colour, Also using a gradient diffuse map to differentiate between the colours. Then also created a path for the smoke to follow in and around the trees/logo. This then enabled me to place the smoke on stage and work out where the ins and outs of the path would be and to make sure it was seen enough as the camera panned around.

Sound
For the sound FX, I wanted to use something that was familiar with Lost, so i thought the best thing I could go for was the sound of the Black smoke when it hovers around people, so I found a couple of video clips of Lost online, downloaded them and imported them into Adobe Premiere pro, At this point, I could then split the sound from the video and I chose around about 30 seconds worth of audio that could then be exported as an MP3 file for adding to my animation after it had rendered.
My timeline started at around about 900 but because I the speed i wanted the animation to go at, I had to add almost twice the frames (1700) to meet the required length for this animation, but this meant that i could have fast travelling smoke with the right length of animation, however it did slow down rendering times to about 3 hours for the final cut.
Once rendered the music was then added in Adobe Premiere pro with two sound layers so that two tracks could play at the same time, I raised the volume on one of them because I wanted it to be more prominent than the other. Here is the video for the final production of
Sky one Ident 1


